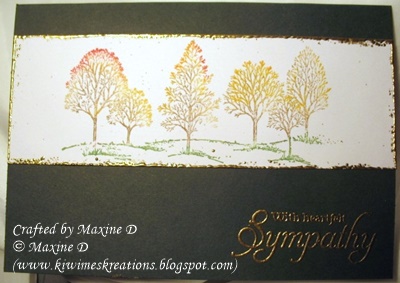
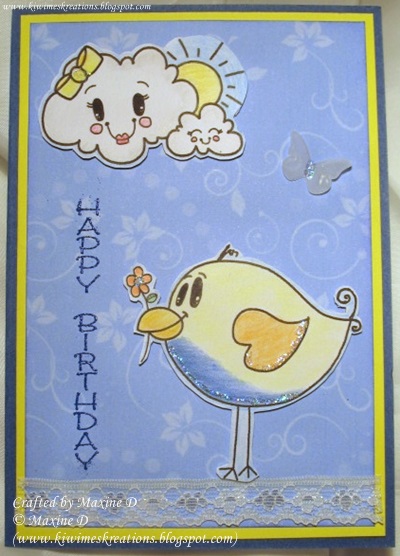
Pages

Tuesday, June 28, 2016

Thanks, in a Green Frame

Welcome

This is a card made on commission, with  specific detail requested.

I kept it CAS as it was for a gent, with just a wee bit of added dark brown bling.


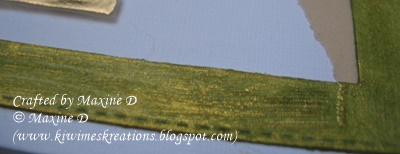
I started with the frame cut by using two Memory Box Stitched Rectangle Dies, and although it was a cream coloured card stock, I painted it with Peeled Paint DI, dried it, and then painted with Ranger Crackle Paint.  I probably did not wait long enough for it to air dry properly (it was a cool, damp day) before I put the heat gun onto it - with the result there was not much crackle occur, but for all that I rubbed Gold Delicata ink over the frame, and liked the subtle result.


I stamped and gold embossed the cross onto pale gold vellum, and fussy cut it.  Part of it was popped up with very thin foam squares, and part was on the frame, which gave it some dimension.


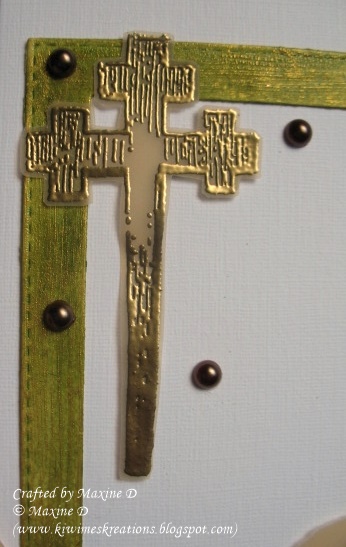
The 'thank you' was also embossed, on a torn scrap of the same vellum, and adhered across the bottom corner of the frame.


The final detail was to add some dark brown flat back pearls.

I am linking this to:


Thank you for visiting my blog - may your day be blessed
Any comments you may leave are deeply appreciated
All comments are moderated and spam, deleted. 


Saturday, June 25, 2016

Baby Carriage

Welcome

I would love to take this time to introduce my newest followers
 Mac Mable of The Sweetest of Peas - please pop over and visit her - her work is wonderful and you will be inspired,
and Monica of Handmade Cards With Love For Charity, who is the queen of making beautiful cards with  up-cycled elements.


The background of this card was one I made at my class this month, where I used a technique called reverse stenciling - I altered the technique slightly and after brayer-ing the dye onto the stencil, I moistened it with a spray of silver shimmer mist.  I can be seen, but the camera did not pick it up in the photos as it is quite subtle.


I inked the edge of the stenciled layer with one of the colours I used on the stencil, and the the purple layers with the other ink.  The white embossed sentiment was an unmarked stamp.
 

I finished the card with a die cut of a baby carriage in the purple, painted with WoS, which you can just see here.  The die is Ornate Pram by Wild Rose - and was a RAK from the lovely Kary at Papercrafting and Travels

I am linking this to:

Thank you for visiting my blog - may your day be blessed
Any comments you may leave are deeply appreciated
All comments are moderated and spam deleted

Thursday, June 23, 2016

A Blue Daisy

Welcome

I have been loving the current trend of spotlighting with an inlaid die cut, and was inspired to make this card using a sketch challenge as my starting point.


The daisy stamp is from a Stampin' Up set, Infinite Goodness, and I coloured the images in the spotlight with Prismacolor pencils


My circle dies are not stitched, so I added faux stitching.


The sentiment is from Rubbadubbadoo Stamps (a New Zealand Company),
and silver embossed.

I love how this card turned out, and am linking it to:


Tuesday, June 21, 2016

Hugs for a Friend

Welcome

I made this card for a friend who has been going through a really difficult time.


Started by planning the card, and cutting the word hugs from the card base - I later cut it from patterned paper and layered that over the cut out, and painted it with WoS.


I then die cut the centre panel with a stitched rectangle MB die, then embossing the balance of the background with a floral folder.


I stamped this wee image using a freebie stamp from the Craft Stamper magazine on the central panel and then on a scrap, with London Fog ink, and lightly coloured the bear with Prismacolor pencils, and used a brighter colour on the flower to make it stand out.


I then stamped and coloured another flower, and layered the cut outs up over the central panel


The wee heart above the bear was coloured the same as the flower, and given some dimension with Glossy Accents.  

The central panel was then re-inserted, followed then by the Hugs - I ran a glitter pen around it as it was not very noticeable - unfortunately the pen slipped in one spot....  this whole reconstructed panel had the edge sponged with a deep pink ink, and was then mounted over a white base.

I am linking this to:


Thank you for visiting my blog - may your day be blessed
Any comments you may leave are deeply appreciated
All comments are moderated and spam deleted.


Sunday, June 19, 2016

Simple Tree Sympathy

Welcome

This is the last for a while (I hope) of the sympathy cards.


Again it was commissioned, with the request that it be very CAS and suitable for a man.

The featured image is from the Stampin' Up Lovely as a Tree set, this time the single oak image. I coloured the stamp with die inks before applying.


The edge of the image panel was first swiped with a silver ink, but it looked grey and muddy, so I added silver embossing powder and heated it, adding more as I went, to get a lovely, irregular silver border.


The unknown sentiment was silver embossed directly onto the Midnight Blue card base.

I am linking this to:

Thank you for visiting my blog - may your day be blessed.
Any comments you may leave are deeply appreciated.
All comments are moderated and spam deleted.

Friday, June 17, 2016

Maple Leaf Sympathy

Welcome

I made this card for my own use this time - it was difficult to make as I do not know the person it is going to - the wife of a work colleague of DH.


I decided to keep with a simple card, and initially used just the sentiment, 


and the leaf and flower embellishment.  The leaf and flower came as part of a RAK from MariLynn DeGroot (of the Mississippi McGyver blog - do pay her a visit, her work is wonderful).


The lines were drawn using a Signo Bronze pen.

It looked rather sparse, and after digging around in my butterfly jar, I found three gold butterflies cut with a sizzex thinlets die, and managed to match the rhinestone on the flower with some from my stash for the butterfly bodies.

The card base is actually a rich cream, but the camera washed it out and I have not been able to adjust it.

I am linking this to:

 - I simply love butterflies!

Thank you for visiting my blog - may you day be blessed
Any comments you may leave are deeply appreciated
All comments are moderated and spam deleted.

Wednesday, June 15, 2016

Sympathy Season

Welcome

It seems that funerals, and requests for sympathy cards, seem to come in batches, and this is one time where I am making numerous such cards for myself, and a customer, to use.


This was a request for a card for a male college of my customer who had lost his father recently, and the request was for something CAS. 


I reached for my Lovely as a Tree set by Stampin' Up, and inked up the large stamp with Memento Bamboo Shoot, Dark Cocoa, Cantaloupe and then a Red variegated ink pad by Serendipity.  


I stamped it on a snippet that was just wide enough to take the stamp, trimmed the ends, and then ran the edges over a Versamark pad before dipping it in gold EP, as I was heating it, I added more EP until I had this wonderful, grungy embossed edge.


Before adhering the image panel, I embossed the ODBD sentiment directly on the card base.

I am linking this to:

Thank you for visiting my blog - may your day be blessed
Any comments you may leave are deeply appreciated
All comments are moderated and spam deleted.


Monday, June 13, 2016

Retiform Birthday

Welcome.

I wanted to make a card using the retiform technique found here.
I researched the word retiform and one definition is 'net like'


I started by sponging the lines with Peeled Paint and Spiced Marmalade Distress Inks, then sat and looked, and decided that I would use the free flower stamp from Visible Image that came with a recent magazine.  
Then came the decision as to which colour to use, and after messing around I chose the Memento Sweet Plum ink.
The extra stamp, Especially for You came from the Kiwistamping Duck set.


I embossed the sentiment in the centre of the card, using a discontinued stamp set


To finish I sprayed the panel with silver shimmer spray, added some silver twine and sequins and then mounted it over a purple base.

I was very happy with the outcome, and the recipient loved it.

I am linking this to:
(A2, Birthday, Sequins)

Thank you for visiting my blog - may your day be blessed
Any comments you may leave are deeply appreciated
All comments are moderated and spam deleted.

Saturday, June 11, 2016

Embedded Thanks

Welcome

I recently made a set of four thanks cards 'on commission'.
The customer does not like frilly and fancy, so I went with embedded die cuts and minimal decoration - and they were a hit.


All four had washi tape to embellish


One had a twine accent


one lace,


and the other two rhinestones as well.


Here is the full set.

My apologies for the brief post, but life is still fairly hectic.

I am linking this to:


Thank you for visiting my blog - may your day be blessed
Any comments you may leave are deeply appreciated
All comments are moderated and spam deleted

Friday, June 10, 2016

A Silver Tree and Sympathy

Welcome

My apologies for being MIA this past week or more, but life has not given me much time to craft or blog.


I started this by cutting a piece of thin card with a large oval die, and using both the negative and positive die cuts, firstly sponging around the positive cut with Memento London Fog ink.


I then cut masks and sponged the background with distress inks, using the negative die cut as the mask for the outside. Once that was dry, (assisted by the heat gun), I stamped and embossed the tree in silver, being careful to stamp just one side of the base of the tree within the 'frame'.


The final stamp was the sympathy sentiment, also embossed with silver.
This panel was then mounted over a subtle silver layer, then a gray marled cream base - this is a card with a recycled base that I buy from a local printer.

I am linking this to:


Thank you for visiting my blog - may your day be blessed
Any comments you may leave are deeply appreciated
All comments are moderated and spam deleted.

Sunday, June 5, 2016

Silver Bi-plane Birthday

Welcome

This card was made for a grandson's recent birthday.


I started by stamping and embossing the sentiment, and then coloured the letters with coloured pencils, and masked it.


I then stamped the bi-planes with Espresso Ink, masking as I went, then I partially over-stamped with a script stamp to form a background feature, then sponged a sky-scape behind with a home made 'cloud' mask, darkening the sky as I went up the card.
 

the bi-planes were then painted with silver Inka Gold.


The finishing detail of the feature panel was to add Glossy Accents to the letters.
All stamps were from Kiwistamping.

I am linking this to:

Thank you for visiting my blog - may your day be blessed
Any comments you may leave are deeply appreciated
All comments are moderated and spam deleted

Wednesday, June 1, 2016

Tweet Birthday Wishes

Welcome

Being the first of the month it is time for my DT card for
This month we have used images from Cre8tive Hands, - these are free ones on her blog.
The two images I have used are Cute Clouds and Bird With Flower, backed with paper from A Bit More Time To Craft called Flower Swirls


I sized and printed the images off, and then coloured them with Prismacolor pencils, and added a wee tad of Stickles.


This vellum butterfly was on my desk and it flew onto the card, so I added some Stickles so it would not feel left out.


The images were mounted on foam dots to give a hint of dimension,


Some lace, a blue embossed sentiment and some layers completed the card.

I am linking this to:

Thank you for visiting my blog - may your day be blessed
Any comments you may leave are deeply appreciated
All comments are moderated and spam deleted.